I kind of liked my little design cut in the board, but after a few printings, the design began to deteriorate. So, at home I decided to cut one from linoleum.
This lead to more interest in block print making, and especially reduction prints! I remember seeing some prints like this at an art festival, and I wondered how did it happen that you could do a lino or wood cut and the printed design would have many different colors?
I found out that when doing a print like this, the artist carves out only part of the design for the first color, prints it, then carves out for the second color, and so on. You need to print this on as many pieces of paper you want to wind up with right from the beginning, because parts of the design will be carved away and lost at each stage.
It seems that it would be very hard to think of which colors and which part to carve at each stage, but after watching a few videos about it on youtube, it became clearer.
The design is drawn on the block, then only the parts you want to stay white (if any) are carved. The colors are printed lightest to darkest. So, you print the block with the first color, and the areas you had carved are still the white of the paper. Then the areas you want to remain the color you just printed are carved out. The second color prints over the first, but your carved out areas are saved. And so on.... for each color.
I wanted to give this a try, so using a sheet of fun foam, I glued it to a board and drew a quick design of a cup and saucer on it. I carved out what I wanted to stay white, and printed it twice with a light gray. Then I cut out the parts I wanted to stay gray, and printed the next color, red. It could be tricky to line the block back up with the print, but I got lucky. It was awesome!! I was so excited to see it happen. I used some black and printed again. ( I added those little pre cut self adhsive foam flower shapes, it was hard to cut them out with the x acto knife).
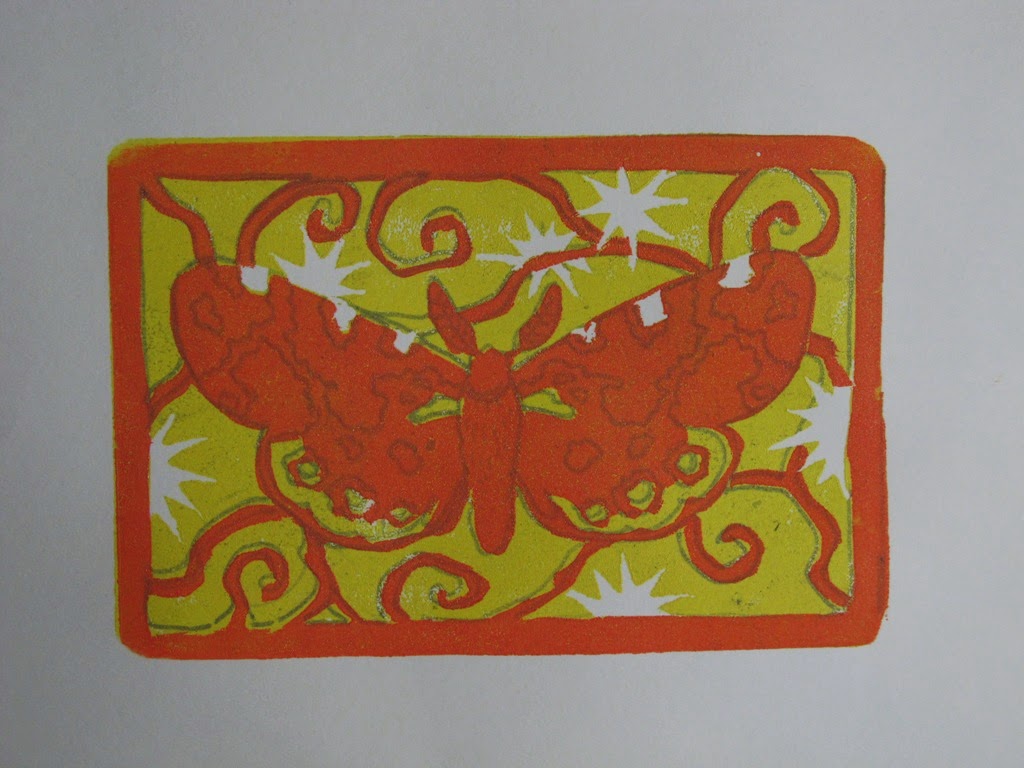
Now that I had the idea, I thought I would get fancy and do a much more detailed design. I picked out a butterfly design. I glued a piece of self adhesive fun foam to a foam core board, without peeling off the backing. I was thinking that when I cut the pieces out, they would come right up off of the backing. I drew the butterfly and some vine shapes in the background with a ball point pen.
I used an x-acto blade to cut out the peices I wanted to stay white, and printed it with yellow ink. The pictures might be confusing at this point, the foam is also yellow.
Here is my print, I was surprised to see my pen drawing came up with the ink and printed... this could be good for another sort of print, but not this one! Next time I'll have to remember to draw with something permanent. (but isn't ball point pen permanent? Maybe not always)
Ok, next I cut out everything I wanted to stay yellow, and then printed with orange. Here's my print, with the first color, yellow, and the second color, orange printed over it. I tried to line up the block with edges of the print, but I was off. I did 4 of these prints and they were all a bit off register. If the drawing hadn't transferred to the print, maybe it wouldn't have looked so obvious!
I chose red for my next color. I'm finding out that the foam is ok for big shapes, but not for small delicate ones! Even using a sharp x acto blade.
Then, my next and final color was a dark brown.
and here is what is left of my printing block. Which makes me wonder... when using a lino or wood block, after all that cutting work you're left with a printing block that can't be used again. But, maybe that is what makes it special. The number of prints you get from this one time only process, is all there will ever be.
So, I didn't wind up with any useful prints, but I learned a lot from it, and I had fun. I will definitely be trying this again. But, maybe next time I'll get brave and use linoleum for a cleaner cut design. And spend more time planning the colors of the design and a way to line them up correctly!


No comments:
Post a Comment